I've tested a few motors using my HobbyKing 7-in-one watt meter to learn the whole which prop/ESC/motor/battery thing.
There's some good videos on this topic notably Ed from Experimental Airlines who did and exhaustive study with some kitchen scales and a watt meter.
Being lazy I wanted to avoid the onerous task of actually writing down numbers and enlist the Arduino to do it for me.
Having done a few Arduino projects I thought an automated test stand might be fun to try. I'd never output PPM from an Arduino or read from current sensor but how hard could it be?
The main difficulty was outputting the right values for arming, you need to go from something the ESC recognises as low throttle, to high, then back to low. I tried a few things to work it out including hooking up the ESC to my servo tester to see what the PPM values should be.
Main Components
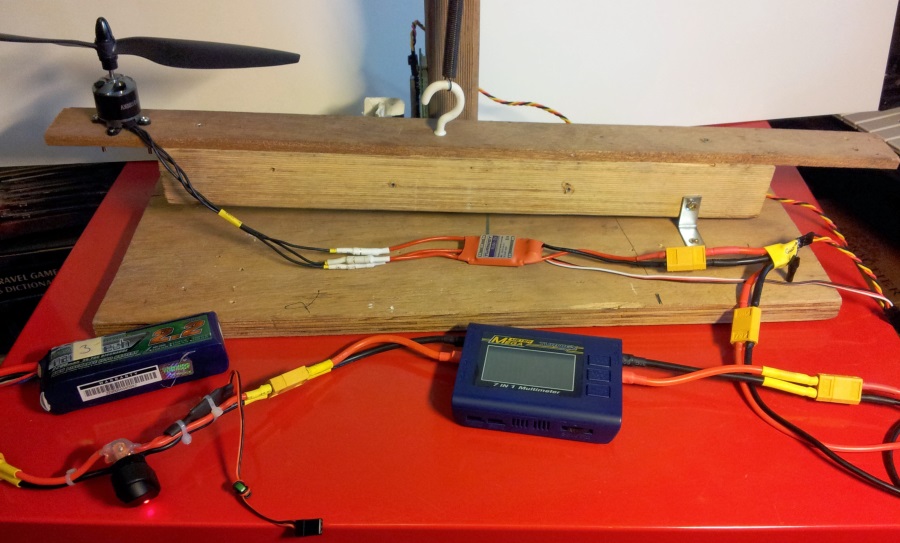
I did 4 years of woodwork at school so it should have been better than this
Arduino
Just an Uno I had lying around, no special shields but I have a proto shield that I might use to tidy up things and get rid of the breadboard.
Current sensor
Spare one from my Bixler build - from RCTimer I think.
Thrust sensor
I had an old Phidgets force sensor but I discovered it isn't accurate. It's intended to just sense force, not tell you how much. I ordered a some sort of strain gauge on eBay and it never arrived - that's $3.56 I'll never see again. I have an old kitchen scale that I'm planning to tear down and use if I can find a measurable analogue voltage on it.
In the meantime I've used a spring from and old desk lamp and a slider pot to give a fairly good thrust measurement. I calibrated it by hanging a cans of beans from it - isn't science wonderful!
Temperature sensor (eventually)
Pointed at the motor to record heating. This could be good for endurance testing but a high amperage supply from the mains might be better to eliminate battery fade from the results.
.Net Application / Firmata
After feeling a bit confined by the Adruino code limitations and slowish code upload speeds I discovered this excellent bit of code called Firmata which allows you to control a connected Arduino from, in my case, a C# application running on a PC. I was able to do a lot more (e.g. funky-town user interface including graphs) and luxuriate in object-oriented goodness.
I'm sure that once I learn a bit more about Arduino scripting (or is it sketching?) I'll be able to structure my code a bit better an dpossibly use a little LED display shield although I do like the graphs. I might have to investigate using one of those OLED shilds that have the resolution for graphs.
Basically Firmata has a library/DLL that you can call to do inouts and outputs on the Arduino. Firmata handles the rest - as far as your .Net application is concerned the action is happening locally.
A solution in Visual Studio runs the motor and record the results. It arms the ESC then steps up the motor incrementally and records the current, voltage, thrust and one day the motor temperature at each step. Gunna get to grips with GitHub so the code is available.

User interface
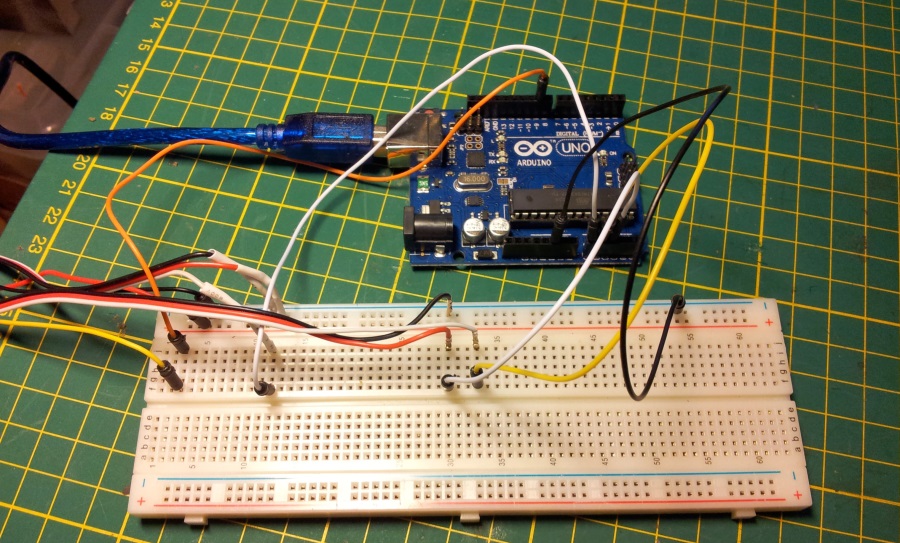
The Arduino and breadboard, the breadboard isn't essential, just convenient for connecting the test stand.
Things to Do
- Make a smaller, neater frame
- Make a prop guard
- Do a video
- Clean up wiring, make Arduino shield
- Make quick release system for motor
- Upload the code
- Spreadsheet creation, Excel, Google Docs, comparison site
- Vibration sensor?
Remember
- Safety first! Either make a prop guard or wear eye protection.